Keeping your air fryer in top shape doesn’t have to be a chore. With a few quick tips, you'll ensure it lasts for years and continues to whip up those crispy, delicious meals.
First things first: always unplug your air fryer before cleaning. Safety first! Once it's unplugged and cooled down, remove the basket and pan. Most of them are dishwasher safe, but a quick hand wash with warm, soapy water will do the trick, too. Don’t forget to check for any stuck food bits that might need a little extra scrubbing.
Next, give the heating element a gentle wipe with a damp cloth. This little step can go a long way in maintaining performance. Just make sure you don’t use any harsh chemicals or abrasive sponges. A soft cloth is all you need.
Also, keep an eye on the outside of your air fryer. Wipe it down after each use to keep it clean and spiffy. This avoids grease buildup and keeps your kitchen looking tidy. Regular checks will help you spot any issues before they become problems.
Lastly, store it properly when you’re not using it. Make sure the air fryer is completely dry before putting it away. This keeps mold and funky smells at bay. Following these simple tips will keep your air fryer running smoothly and help you enjoy all those tasty meals!
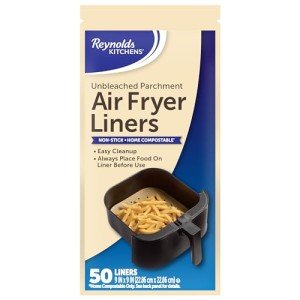
Gather Your Cleaning Supplies
Before diving into the cleaning process, it's super helpful to gather all the supplies you'll need. Having everything in one spot makes the job quick and easy, so you won’t be running around looking for things mid-clean!
Here’s a simple list of what you should grab:
Once you have your supplies, take a minute to check the air fryer’s manual. Some models might have specific cleaning instructions or parts you shouldn’t soak. Keeping your fryer in great shape is all about knowing what works best for your model!
Step by Step Cleaning Guide
Cleaning your air fryer doesn’t have to be a hassle. Follow these simple steps to keep it in tip-top shape, so it continues to whip up your favorite crispy meals!
Step 1: Let It Cool Down
Always wait for your air fryer to cool down after cooking. This helps prevent burns and makes cleaning easier. A little patience goes a long way!
Step 2: Disassemble the Parts
Remove the basket and pan from the air fryer. These parts usually come off easily, making them perfect for a quick clean. Check your user manual if you’re unsure how to take them apart.
Step 3: Soak and Scrub
Soak the basket and pan in warm, soapy water for about 10-15 minutes. This helps loosen any stubborn food bits. After soaking, use a soft sponge or cloth to scrub away any residue. Avoid harsh scrubbers that could scratch the surface.
Step 4: Wipe Down the Inside
Grab a damp cloth or sponge and give the inside of the air fryer a good wipe down. Make sure to get any grease or food splatters. Just be careful not to get any water on the heating element!
Step 5: Air Dry and Reassemble
Let all the parts air dry completely before putting them back together. Once dry, snap everything back into place, and you’re good to go! A clean air fryer is ready for your next delicious meal.
Tackle Tough Stains Effectively
Cleaning your air fryer might seem like a chore, especially when it comes to those tough, greasy stains. But don’t worry, tackling them can be super easy if you know the right tricks. First things first, make sure your air fryer is completely cool and unplugged. Safety first!
One of the best ways to loosen up those stubborn stains is with a natural cleaning solution. Mix equal parts baking soda and water to create a paste, then spread it on the stained areas. Let it sit for about 15 minutes. Baking soda is a superstar when it comes to breaking down grease, and it won't harm your air fryer.
After the paste has done its magic, grab a non-abrasive sponge or cloth and start scrubbing gently. You want to avoid scratching the non-stick surface. If your stains are really tough, you can try soaking removable parts in warm, soapy water for about 30 minutes—this can make a world of difference.
For more stubborn spots, a little white vinegar can help. Spray it on the stain, let it sit for a few minutes, then wipe it away with a damp cloth. It’s amazing how well vinegar cuts through grease. Remember to rinse everything well afterward to remove any residue.
Finally, dry all the parts thoroughly before putting your air fryer back together. A clean air fryer not only looks better but also works better. Keeping these tips in mind will have your air fryer looking brand new in no time!